National Sewing Month Challenge: Easy Steps to Make Your Own Mouse Pad
- Fiavi
- Sep 12, 2024
- 3 min read
Updated: Jan 15
Did you know that September is National Sewing Month in the United States? I just recently found out myself! As a sewist, I wanted to jump in and celebrate so I thought it would be the perfect opportunity to challenge myself with something I have never made before.

The result…? A stylish mouse pad made with leather and African print fabric. I’m so happy with how it turned out and I am excited to share with you a step-by-step guide on how I made this beautiful mouse pad.
Don’t worry — this project is so simple you can hand stitch if you don’t have a sewing machine! But first, here is a quick history on National Sewing Month...
A Quick History of National Sewing Month
In 1982, President Ronald Reagan officially declared September as National Sewing Month to honor the importance of home sewing.
He acknowledged the "industry, skill, and self-reliance" that millions of Americans demonstrate through sewing.
This year’s theme, Sew Sustainable, encourages sewists to think creatively about reducing, reusing, and recycling materials. If you’re curious about National Sewing Month and want to learn more, check this link out.
Now, let's dive into my project for this special month! In the spirit of sustainability, I decided to use leather and African fabric scraps to create my mouse pad.
DIY Leather and Fabric Mouse Pad
Making your own mouse pad at home is a fun and easy DIY project. Here’s a step-by-step guide to help you create one:
Materials You’ll Need:

1. African Print Fabric: Any comfortable fabric that feels smooth under your hand, like cotton or canvas, will work if you don’t have African print on hand.
2. Leather: Use medium to thick leather with a textured base for grip and cushioning. If you prefer, you can also use non-slip rubber material for the base.
3. Adhesive: You’ll need strong glue like fabric, spray, or leather glue to bond the fabric and leather.
4. Scissors or Rotary Cutter: For cutting the leather and fabric.
5. Pencil and Tracing Paper: To sketch the mouse pad pattern.
6. Sewing Machine or Needle and Wax Thread: To add decorative stitching
Step-by-Step Instructions
#1 - Pick Your Size and Shape
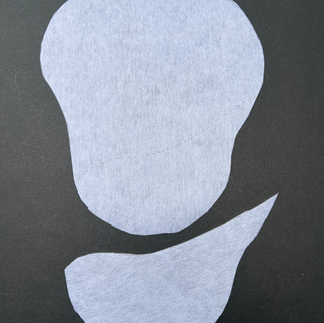
A standard mouse pad is around 9x7 inches, but feel free to get creative with the size and shape. I sketched an organic shape on paper that is close to the standard mouse pad.
#2 - Cut the Materials
Using scissors or a rotary cutter, cut the leather and fabric to match your chosen pattern. Be sure to leave about a ¼ inch allowance around the fabric for wrapping around the leather.
#3 - Wrap and Glue
Wrap the fabric around the leather and apply glue evenly. Smooth out any wrinkles or creases and let it dry.
#4 - Sew
If you want extra durability, sew around the edges of the fabric-covered leather, leaving a ¼ inch seam. If you don’t have a sewing machine, you can hand-stitch, but keep in mind that thicker leather can be tricky to sew by hand. You can also decide against sewing the edges.
#5 - Attach and Press
Attach the fabric-covered leather to the plain leather using fabric glue. Press down firmly and allow it to dry completely

#6 - Trim Excess Material
Once the glue has dried, trim any excess fabric or leather so the edges align perfectly
#7 - Enjoy Your New Mouse Pad
That’s it! Head to your desk and give your brand-new, handmade mouse pad a try!
BONUS!!!
If you'd rather have a square mouse pad instead of an organic-shaped one, give this design a shot using the same steps. It's way easier and straightforward!

Don’t Forget!
Now that you know how to make a mouse pad, get creative with different shapes and designs and consider gifting these to family and friends—or even using them to raise funds for charity!
Don’t forget to subscribe to my mailing list to stay updated on future DIY projects like this.
Happy National Sewing Month!
I'm so excited to share my favorite sewing tools and products with you! And yes, some of the links in this post are Amazon affiliate links, which means I earn a small commission when you click one of these links and buy something. But this doesn't cost you anything extra! Also note that I only recommend products I have already tried or I'd actually use myself.


Comments